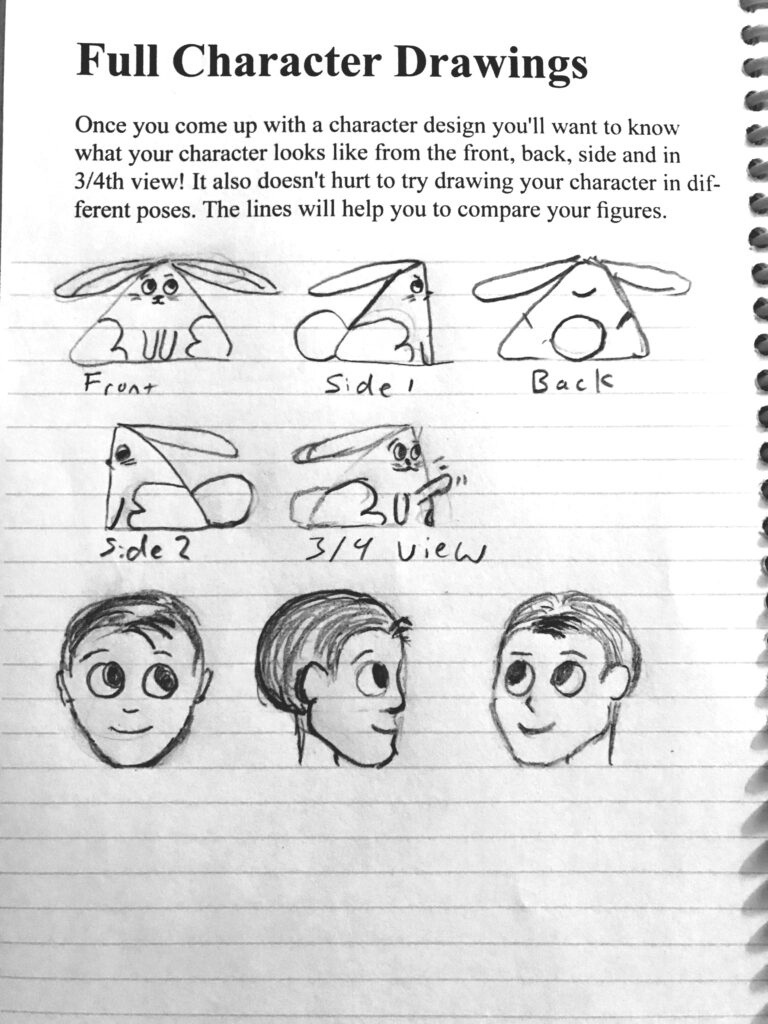
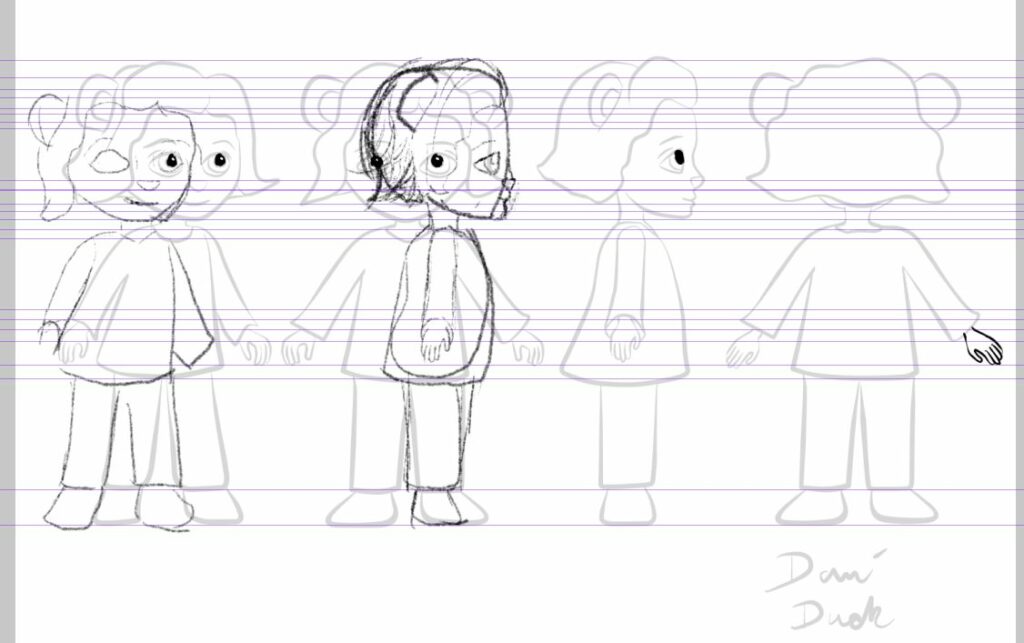
A character turnaround is a way to get to know your character from all angles. This is the information you’ll need to draw your character the same way every time! Even though you make these your character may evolve while you are creating your book and that’s okay, too!
Things you might need: Paper, Pencil and likely a ruler. Tracing paper or a light box is optional. Possibly a right angle ruler.
Or a digital photo/illustration program. Must be able to work in transparent layers and have guidelines (which is most digital programs).
In your booklet on pages 10 -11 you’ll see some lined paper. I find this as the easiest way for me to plot out my character. Especially the easiest way to execute the Turnaround. The top is a full character turnaround and the bottom is a face.
When I’m doing character drawings I generally make the face large and the I like making eyes be big enough to fit on a line. It makes it easiest for me to figure out where everything should be. It’s really nice to be able to know which line the eyes, mouth and nose should rest. It’s really easy to get the character’s side, 3/4th or front view off because visually it will look okay, but if you use a ruler things will be way off.
There are some artists who prefer to use graph paper, and that’s not wrong! It’s just not the way I do it. I find the vertical lines throw me off, but they are great for making sure the width of everything is the same throughout the drawing.
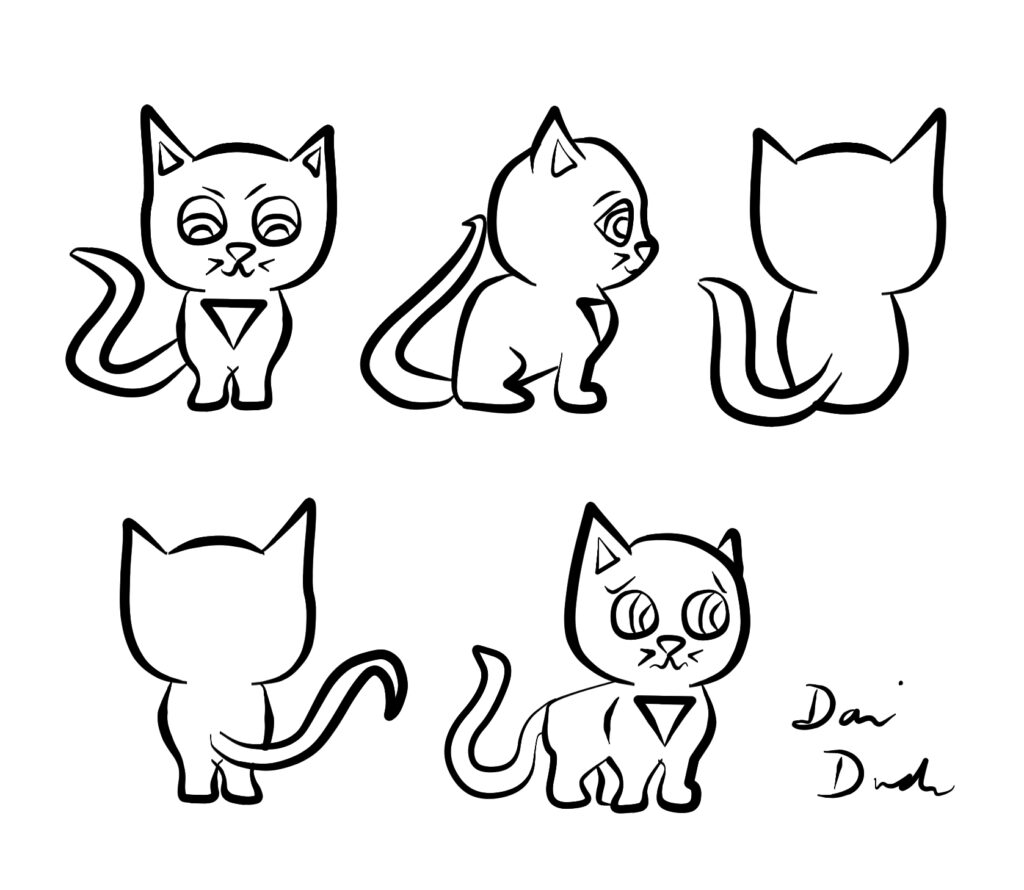
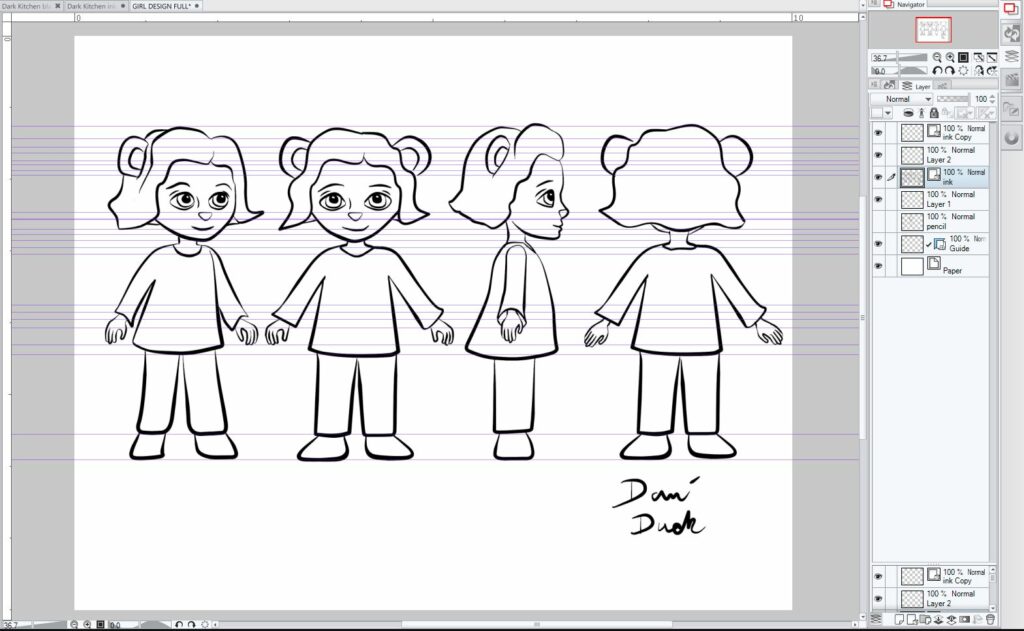
Some turnarounds for characters. Face is front side and 3/4th view.
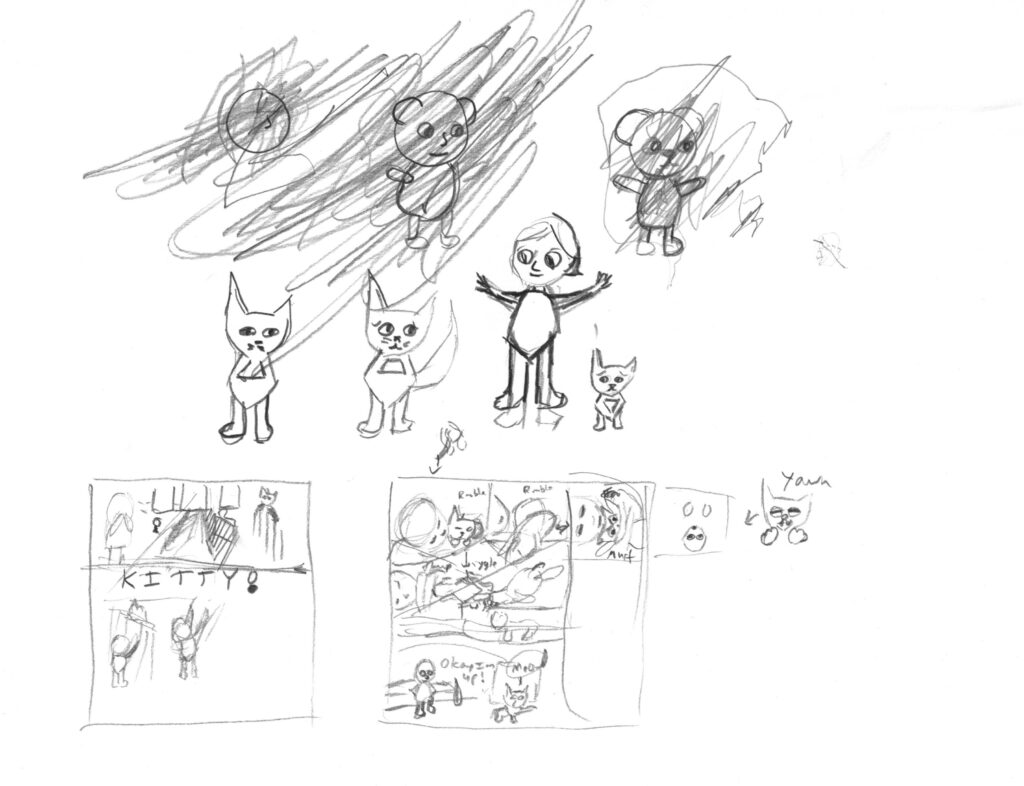
I started out with a lot of scribbles and a little bit of an idea of what I was going to create for my portfolio. It was going to be a comic style illustration. I had basic ideas for character design before I worked on some thumbnails. Most of the story I worked on in the left hand side will likely never be in an illustration. Sometimes it helps to work on what happens before a scene, even if that work isn’t seen by other people.
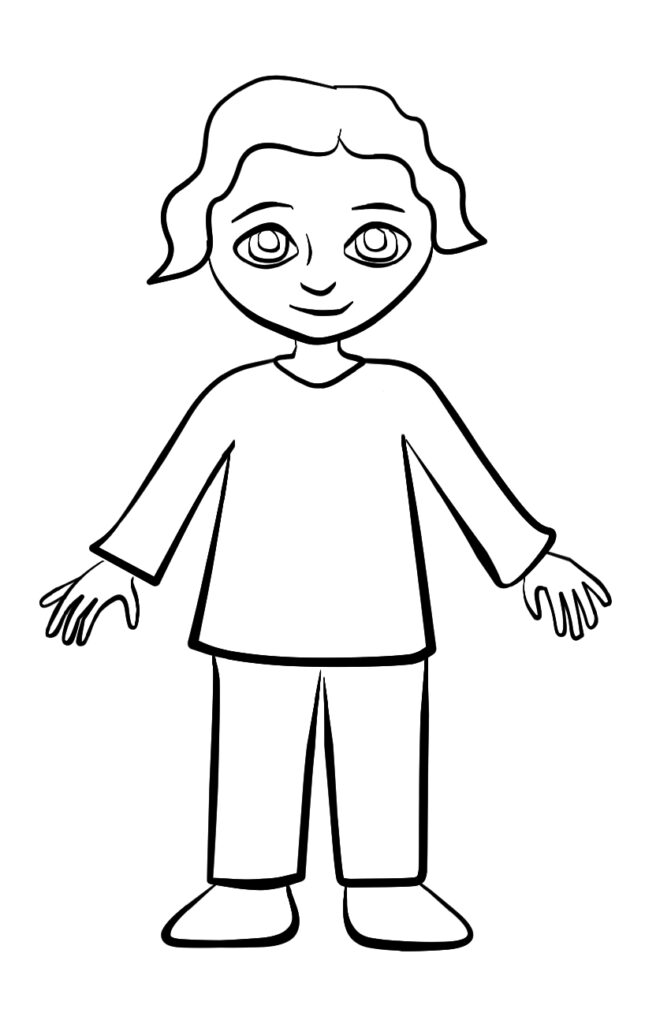
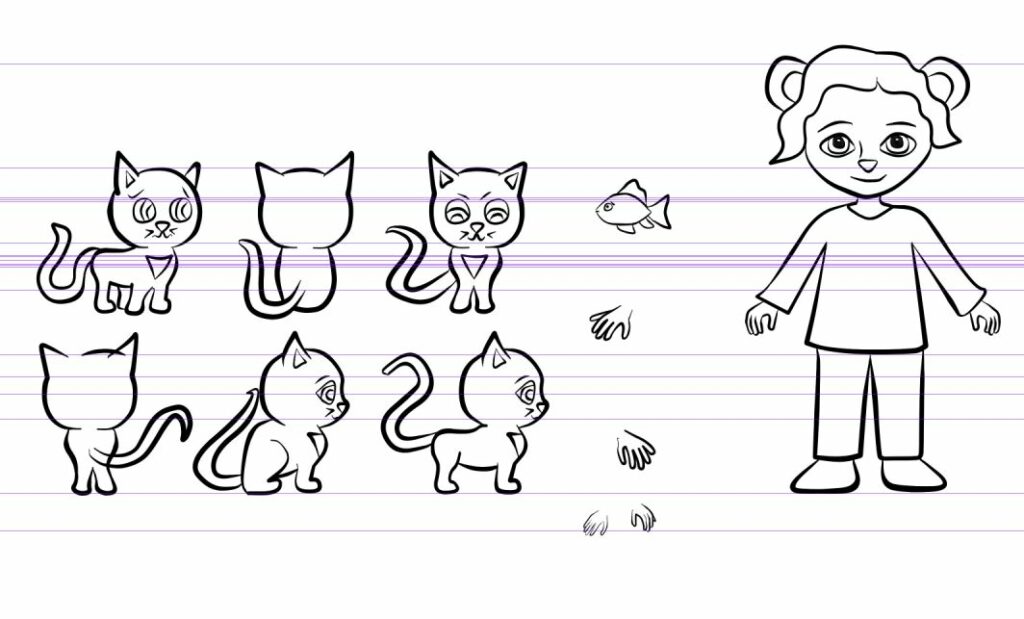
These are the characters I started with. Just a kitty and a girl. I liked the kitty, but the girl I didn’t really like. She felt too old for the story I wanted to write. She also was quite plain. I added some ears later to make her a bear character. I had a friend who asked if she was a giant mouse. She wasn’t, but I thought it was more fun for her to be a giant mouse taking care of a kitten, So things were changed!
Tracing Paper
One thing I adore about using Clip Studio Paint (and all other digital programs) is the ability to to make a layer more transparent. This allows you to draw your character with a light table effect. You can make sure that your character is similar from all angles! Her eyes nose and mouth all line up and the width of the character stays the same throughout.
If you are working traditionally I highly suggest a light table or tracing paper to create your images. This will allow you to make sure your character looks alike in all their poses.
Guidelines Digital and Traditional
Digital: If your digital program has a ruler, then it probably has the ability to make guidelines. Just right click on the ruler, while you are holding the right button drag the line to where you want it, and then let go of the button. You can change where the line is with an arrow button This can vary from program to program.
I started this drawing with putting lines around the feet head and hands. I can also check the hem of her pants and all the facial features with the guidelines. They can get to be too much while drawing, so there is always a place in your program to turn these off.
Traditional: If you are drawing a character traditionally you almost have to draw in all the lines. I said before that I minimize this by using lined paper. This helps a lot, but there is likely something else that I can’t quite line up that way. If you have a right angle ruler you can put a ruler vertically along the right or left edge of the paper (preferably the red line on lined paper) and draw a horizontal line across the paper.
Alternatively you can use a ruler to measure out where each new line goes. This takes a lot of dots and line drawing. It’s frustrating and I hate it, but use it often.
The third option is to just eyeball the whole thing on lined or graph paper. This option is great for all us stubborn people out there. It’s maybe not the best option, but it’s still an option.
The Best Laid Plans
Sometimes even the best laid plans go awry! Neither character here is what I expected them to be, but it’s closer to my final drawing than any of the previous drafts. I’ve made my cat’s head much more rounded and the girl’s features are much more animal like. Even though I worked on these characters several times the characters kept changing in the drawings. I had just finished working on a cat story and the characters in the dummy were exactly like the characters I designed for the dummy.
Ideally, you’ll come up with a character design that you’ll just use in your drawings. Ideally, your whole story wont change while you are working on it. I do hope things wont change for you, but if they do accept the changes and have fun with your art!
If there is anything you need explained further let me know! I could possibly do a video if there are people who would like to see it!