• Art,  Writing

    Give Yourself a Break

    The last couple of days I’ve been feeling really off. I’ve been tired, irritable, so and did I mention tired? I’m sick again for the 3rd time in 2 months (The first two sicks maybe should be considered 1 because I didn’t fully recover on the first antibiotics). In any case I’m not here to complain about my sickness but more to talk about what happens when I get sick.

    When I’m sick I generally try to work through it. I have 2 kids and I have to take care of them if I’m sick and often I do the same thing when working on my art. This leads to me being sicker in the end and I actually get worse because I don’t take that break.

    A bit ago I was worried about doing a book review. Part of the problem was that I don’t understand the full logistics of doing book reviews, and the other part is being sick is making everything harder. It may be that book reviews aren’t my thing and I will look at that again with a clear head. I also don’t HAVE to do a book review right now. It’s not in anyway necessary. I wanted that to be a regular part of my blog, but no one is depending so much on my book reviewing skills that it’s a necessity for me to finish this one review.

    There are times in life where you will have to work through being sick. If you don’t have a strictly enforced deadline then give yourself a break! Only you know when you are sick enough to take that break. Many publishers and workplaces will give you a break if you let them know what’s happening.

    If you are pre-published or working on your next book project then know you can and maybe should take a break if you are really sick. If you have a family emergency you are allowed to take time off. In many cases you will get more done and be under so much less stress if you give yourself a break!

    Be nice to yourself my friends!

  • Art,  Smart Dummies

    More Great Tips and Tutorials

    Smart Dummies is winding down. I have a few more great sites for art tips and tutorials. I wanted to share these before Smart Dummies ends!

    Instagram:

     
    Gabrielle Patrick: https://www.instagram.com/gabs_art_tips/
    Robin and Lorenzo: Eterington: https://www.instagram.com/etheringtonbrothers/
     
    Griz and Norm Lemay: https://www.instagram.com/grizandnorm/
     

    Websites:

    Natalie Merheb:

    http://nataliemerheb.com/illustration-101/childrens-book-illustration-portfolio-checklist/

    Courses:


    SVS Learn has a #Inktober special on right now. Sign up in October and get 30 days for FREE: https://www.svslearn.com/

    Mira Reisberg’s the Craft and Business of Children’s Book Illustration class has been delayed, which it means there is still time to sign up for the 2020 class. This may be the last live Children’s Book Academy class so sign up now! https://www.childrensbookacademy.com

    Comments Off on More Great Tips and Tutorials
  • Art,  Smart Dummies

    Support Me on Patreon!

    I hope you are enjoying Smart Dummies this year. I love helping out other people and I hope you are learning a lot, or at least getting a lot done this month. Smart dummies is not an easy event, so be nice to yourself and celebrate what you are able to complete.

    Today is my birthday! What better way to celebrate than to update all my reward tiers and give presents to all my patrons on Patreon? I feel like I’m winning my birthday already: https://www.patreon.com/SmartDummies I don’t have presents on Kofi, but you’ll have my love if you can only make a one time donation there. https://ko-fi.com/daniduck

    It is not free for me to run this blog and the events do take a lot of my time. If you have the money, please consider helping me out. I will be working to giving you lots more value for your donations. Check out the new tiers and know that I’m open to suggestions! 

    TIERS
    Smart Member
    $1 or more per month

    Basic Membership Includes

    + Monthly Art Process Videos

    + Monthly Challenges to help encourage creativity in your writing and art

    + Your name listed in a special post before Smart Dummies and  Spring into Writing!

     
    Smart Fiver
    $5 or more per month

    All of the previous tier benefits plus:

    + Your questions answered on a short video every month.*

    + Extra entry on all Patreon giveaways and contests.

    + Your name listed in a future Smart Dummies/Writing Challenge Booklet.

    *You ask me 1 question a month and I’ll give you a video answer of your question on Patreon. Access will be given to everyone in this level and above.

     
    Smart 10s
    $10 or more per month

     All of the previous tier benefits plus: 

    + 1 Hour Chat with me and other Smart 10s every month.

    + Exclusive Smart 10s only content.

    https://www.patreon.com/SmartDummies

    Want to make a one time donation? https://ko-fi.com/daniduck  (This will not give you access to patron rewards, but I will love you forever. Even if you don’t donate.) Feel free to contact me about other ways to donate!

  • Art,  Smart Dummies

    Fun Art Videos!

    I have a fun inking video that I made today. I need to go back in and edit it a bit. 5 minutes of me having the save dialog open isn’t that much fun to watch. I will be adding sound and hopefully narrate this as well. Hopefully I can get this up for you soon! For now here are a few instructional Youtube channels that will help you with your art!

    SVS Learn — Home of the 3-point perspective podcast (video version). This podcast tells you everything you need to know about Children’s illustration! Will Terry, Jake Parker and Lee white host. Their excellent Youtube channels are also below https://www.youtube.com/user/SVSLearn/videos

    Will Terry — Kidlit Illustrator with a huge collection of videos about the craft and business of kidlit books! https://www.youtube.com/user/willterryart

    Jake Parker —  Creator of Inktober and Illustrator https://www.youtube.com/user/jakeparker44/videos

    Lee White — Kidlit illustrator and Fine Artist https://www.youtube.com/channel/UCa8I_myjn8osVaEPsS7eq1Q/videos

    Rachel Armington — Her videos are watercolor, food and crafts! She just posted a video about making clay models for illustration! https://www.youtube.com/channel/UCQ7Eosyn2nYbNbkokKrmPcw/videos

    Chris Hong Art — Some fun illustration techniques and lots of pretty art. https://www.youtube.com/channel/UCGHCzXORMIUiBZmNHr1ovjw/videos

    Sheldene Fine Art — This is a nice channel that has all kinds of different techniques you can try for your own art. https://www.youtube.com/channel/UC_KkCbQ6ZlN0dGnT1GLdz7A/videos


    Have a Youtube channel you’d like to share? Please post the name in the comments below. I’ll be sure to share the channel in a future Smart Dummies post!

  • Art,  Events,  Smart Dummies

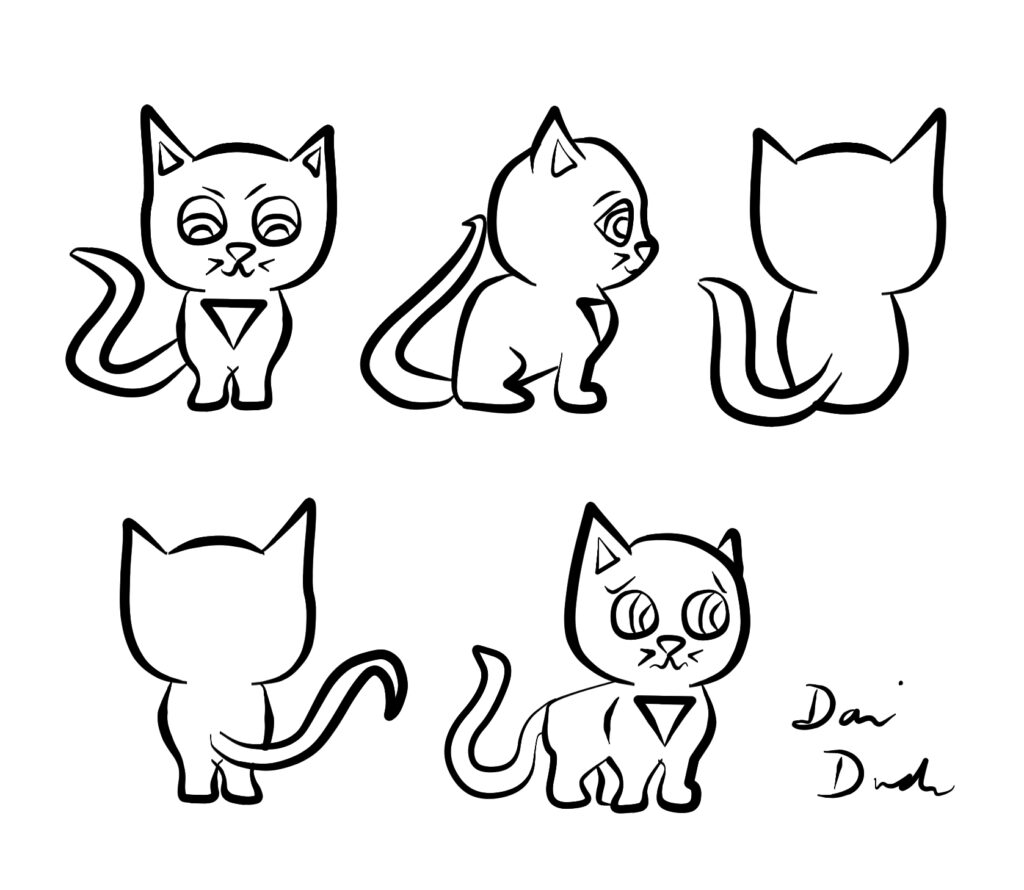
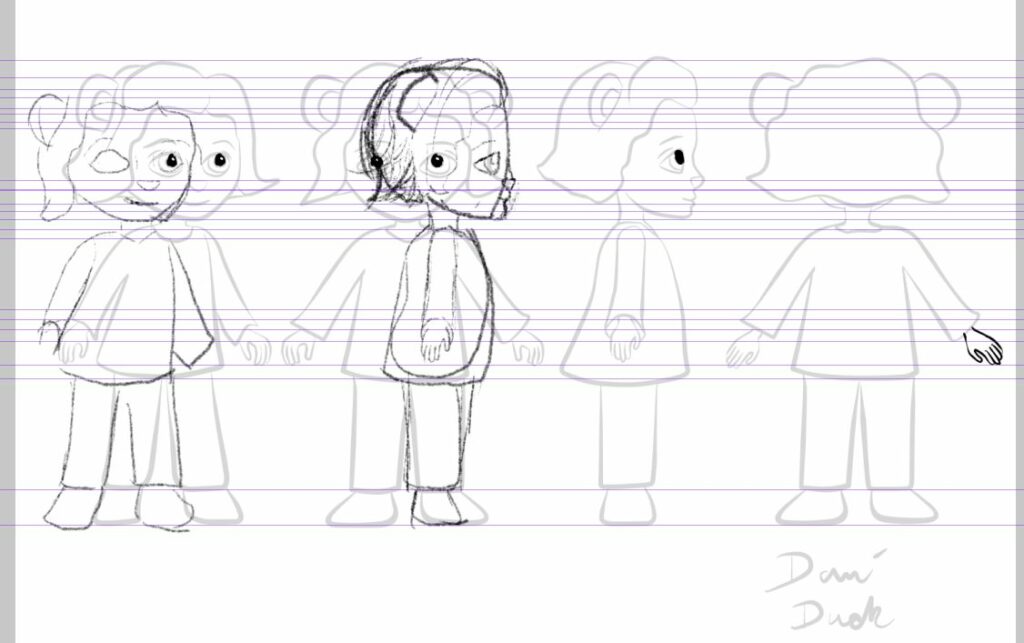
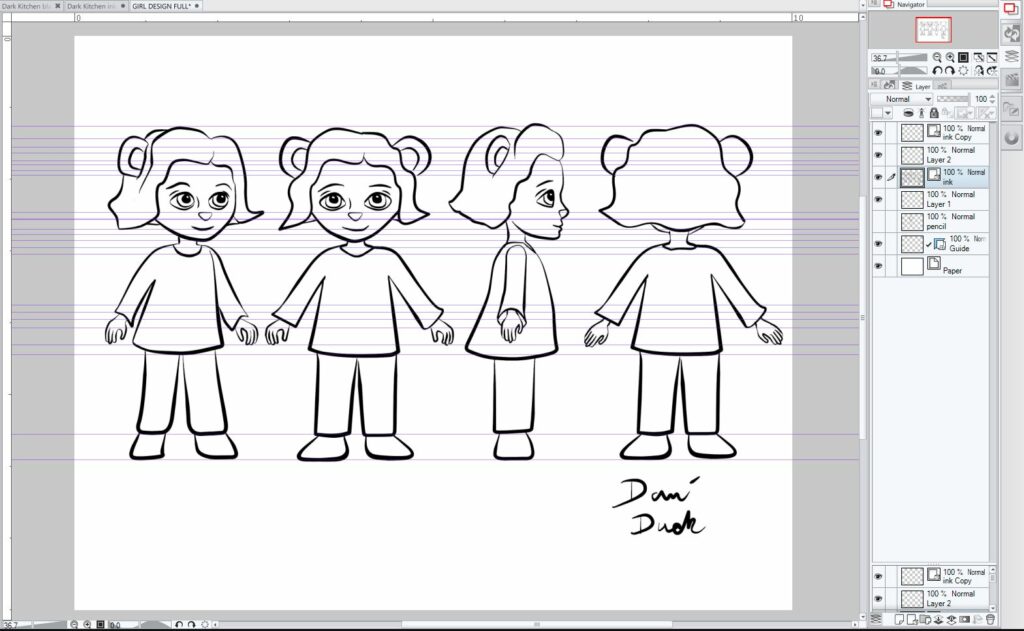
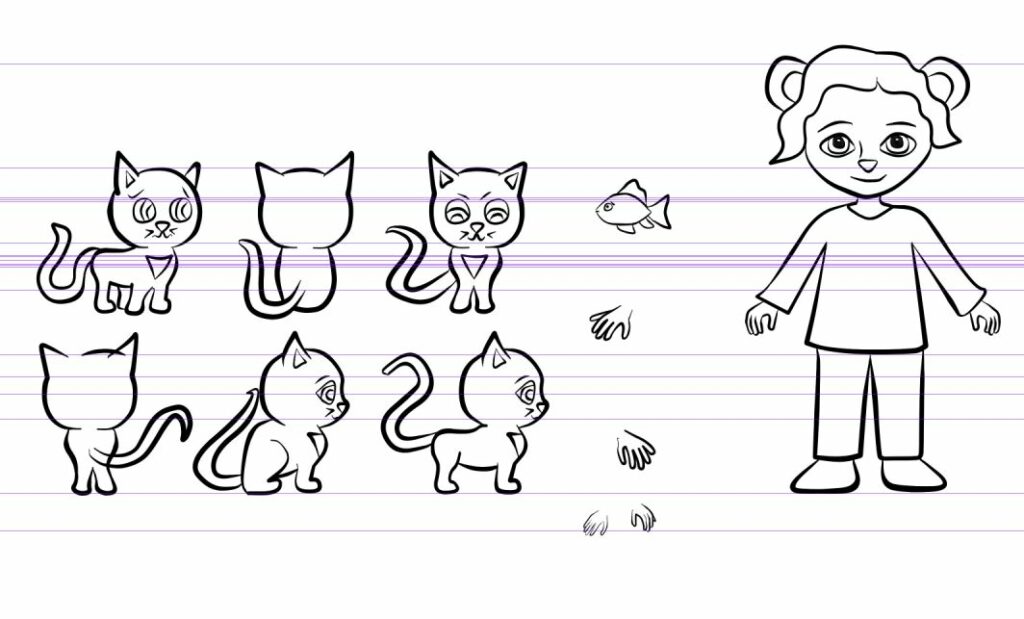
    Character Turnarounds

    A character turnaround is a way to get to know your character from all angles. This is the information you’ll need to draw your character the same way every time! Even though you make these your character may evolve while you are creating your book and that’s okay, too!

    Things you might need: 
    Paper, Pencil and likely a ruler. Tracing paper or a light box is optional. Possibly a right angle ruler.

    Or a digital photo/illustration program. Must be able to work in transparent layers and have guidelines (which is most digital programs).

    If you have not signed up for Smart Dummies this year you can do so here:  http://ngi.c96.myftpupload.com/register-for-smart-dummies-2019/

    Full Character Drawings

    In your booklet on pages 10 -11 you’ll see some lined paper. I find this as the easiest way for me to plot out my character. Especially the easiest way to execute the Turnaround. The top is a full character turnaround and the bottom is a face. 

    When I’m doing character drawings I generally make the face large and the I like making eyes be big enough to fit on a line. It makes it easiest for me to figure out where everything should be. It’s really nice to be able to know which line the eyes, mouth and nose should rest. It’s really easy to get the character’s side, 3/4th or front view off because visually it will look okay, but if you use a ruler things will be way off.

    There are some artists who prefer to use graph paper, and that’s not wrong! It’s just not the way I do it. I find the vertical lines throw me off, but they are great for making sure the width of everything is the same throughout the drawing.

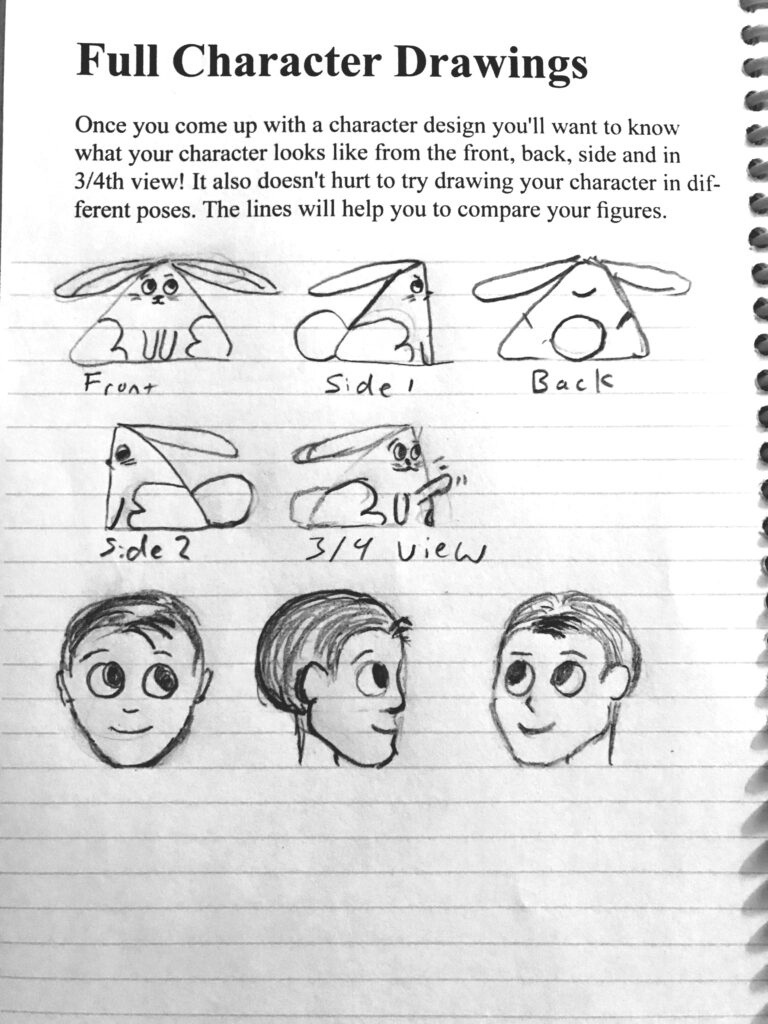
    Some turnarounds for characters. Face is front side and 3/4th view.

    I started out with a lot of scribbles and a little bit of an idea of what I was going to create for my portfolio. It was going to be a comic style illustration.  I had basic ideas for character design before I worked on some thumbnails. Most of the story I worked on in the left hand side will likely never be in an illustration. Sometimes it helps to work on what happens before a scene, even if that work isn’t seen by other people. 

    These are the characters I started with. Just a kitty and a girl. I liked the kitty, but the girl I didn’t really like. She felt too old for the story I wanted to write. She also was quite plain. I added some ears later to make her a bear character. I had a friend who asked if she was a giant mouse. She wasn’t, but I thought it was more fun for her to be a giant mouse taking care of a kitten, So things were changed!

    Tracing Paper

    One thing I adore about using Clip Studio Paint (and all other digital programs) is the ability to to make a layer more transparent. This allows you to draw your character with a light table effect. You can make sure that your character is similar from all angles! Her eyes nose and mouth all line up and the width of the character stays the same throughout. 

    If you are working traditionally I highly suggest a light table or tracing paper to create your images. This will allow you to make sure your character looks alike in all their poses.

    Guidelines Digital and Traditional

    Digital: If your digital program has a ruler, then it probably has the ability to make guidelines. Just right click on the ruler, while you are holding the right button drag the line to where you want it, and then let go of the button. You can change where the line is with an arrow button This can vary from program to program.

    I started this drawing with putting lines around the feet head and hands. I can also check the hem of her pants and all the facial features with the guidelines. They can get to be too much while drawing, so there is always a place in your program to turn these off.

    Traditional: If you are drawing a character traditionally you almost have to draw in all the lines. I said before that I minimize this by using lined paper. This helps a lot, but there is likely something else that I can’t quite line up that way. If you have a right angle ruler you can put a ruler vertically along the right or left edge of the paper (preferably the red line on lined paper) and draw a horizontal line across the paper.

    Alternatively you can use a ruler to measure out where each new line goes. This takes a lot of dots and line drawing. It’s frustrating and I hate it, but use it often.

    The third option is to just eyeball the whole thing on lined or graph paper. This option is great for all us stubborn people out there. It’s maybe not the best option, but it’s still an option.

    The Best Laid Plans

    Sometimes even the best laid plans go awry! Neither character here is what I expected them to be, but it’s closer to my final drawing than any of the previous drafts. I’ve made my cat’s head much more rounded and the girl’s features are much more animal like. Even though I worked on these characters several times the characters kept changing in the drawings. I had just finished working on a cat story and the characters in the dummy were exactly like the characters I designed for the dummy.


    Ideally, you’ll come up with a character design that you’ll just use in your drawings. Ideally, your whole story wont change while you are working on it. I do hope things wont change for you, but if they do accept the changes and have fun with your art!

    If there is anything you need explained further let me know! I could possibly do a video if there are people who would like to see it!

  • Art,  Smart Dummies

    Simple Character Bodies

    Here are some ideas for your character’s bodies! I took one head and tried it on several different bodies. Copying and pasting a head over and over helps with coming up with a body. If I had to pick one, I’d probably go with the one in the upper right corner.  

    Don’t worry if none of these appeal to you. I’ve got some links with some wonderful tutorials that will help you further your art! 

    Different bodies for my lion head.

    Luis Escobar has some wonderful tips for making the perfect character body: http://www.thedrawingwebsite.com/2017/06/07/cartoon-body-formulas/

    Proko has some great tutorials for the bean method of drawing. If you can draw a bean (or something like it) then you can draw a body! https://www.youtube.com/watch?v=0660Fuih7qo

    Drawing the Head and Figure by Jack Hamm: https://www.penguinrandomhouse.com/books/272012/drawing-the-head-and-figure-by-jack-hamm/9780399507915/ (This book is generally under $17

    Andrew Loomis Figure Drawing for All it’s Worth hosted by archive.org: https://archive.org/details/Andrew_Loomis_Figure_Draw


    Character face designs
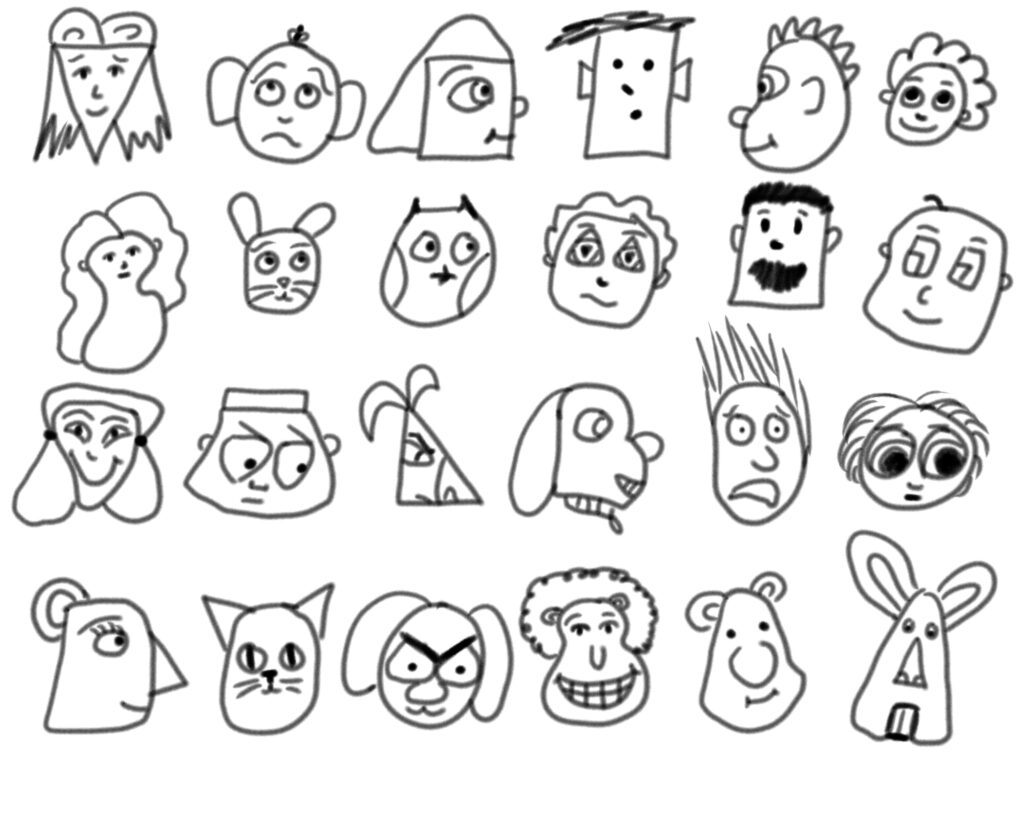
    Head's from yesterday's video. Click here to see the post!
    Comments Off on Simple Character Bodies
  • Art,  Smart Dummies

    Weekend Activities

    Many of you may be on vacation this weekend and that’s great. Though Smart Dummies officially starts on September 1st there will be no official activities planned until September 3rd. Sunday I will have a schedule up for the week and we’ll officially start Tuesday from the beginning. If you want to work ahead, that’s fine! If you are gone this weekend, don’t worry. I’m going over everything again starting September 3rd.

    This Weekend's Project

    You can work on anything you’d like this weekend (or nothing at all). If you already have your character(s) figured out you can either work on Full Character Drawings (pages 10-11) or Thumbnails (pages 18-19). We will be going over all of this later so don’t worry about getting behind.

    Full Character Drawings or Thumbnails?

    I think it comes down to personal preference for order of creation at this point. I’ve heard both ways from professionals and in illustration classes!

    Full Character Drawings/Turnarounds: The lines on this page are to make sure you keep everything in line. Make sure that all the facial features line up. Alternatively you can get some graph paper and use that to plan out your character drawings.

    Thumbnails: If you are doing thumbnails only spend a minute or two drawing each one. They don’t even have to look like anything but scribbles. You can always make tighter thumbnails later.

    Weekend Reading

    Here is a great post from Rachel Armington about Trim Sizes:

     https://rachelarmington.com/publishing/trim-sizes-for-picture-books/ If you have time this weekend take a look! It’s good to have your picture book size in mind when you start on your book. It’s also necessary to know your images should be set up before you start on your finals. I’ll be referencing this post several times throughout the event, because layout is so important throughout this whole Dummy making process.

    It’s necessary to know your images should be set up before you start on your finals. I’ll be referencing this post several times throughout the event, because layout is important throughout this whole Dummy making process.

    I had one project for a client where I didn’t know the sizes of the images. I was lead to believe the images were 8″x 8″ when they were 6″x 9″ which is a huge difference! I was able to fix the problem in time. If you are working on your project you decide the size. In general I’d suggest the images be 8″x10″ (and 10″x 8″ is also a possibility, but not as common) because that’s the industry standard and most likely how your book will be published. This is a standard for picture books and some graphic novels. I’ll get back to you on more page sizes for other books later!

    If you haven’t already sign up for Smart Dummies here: http://ngi.c96.myftpupload.com/register-for-smart-dummies-2019/ This page has everything you need! Sign up, grab a booklet, sign up for emails and get the badge! Be sure to contact me if you have any problems!